C2C Crochet Sports Pillow
- Jan 13, 2023
- 2 min read
Updated: Sep 14, 2023
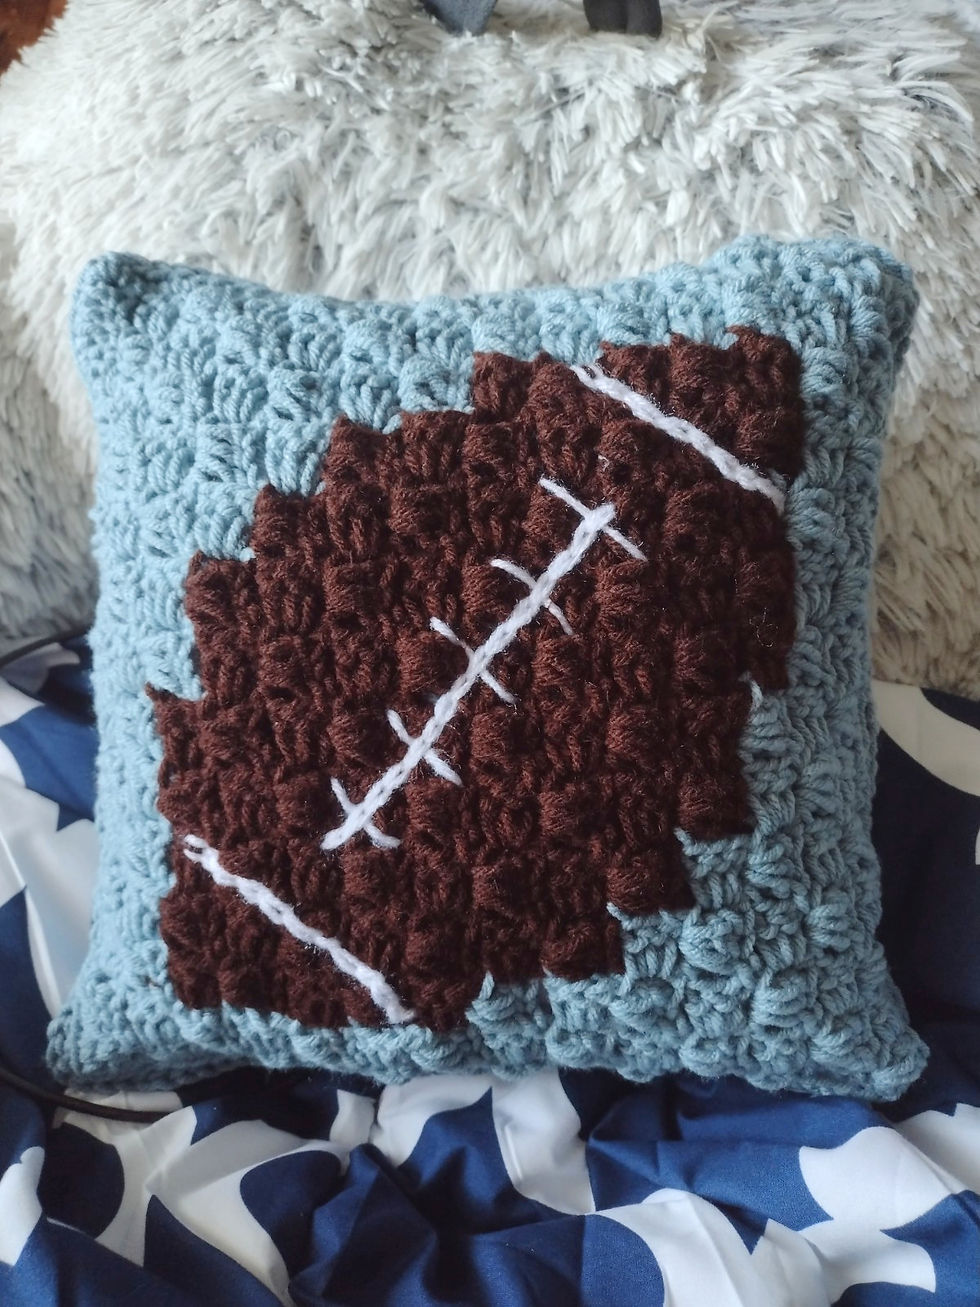
Super easy C2C pattern for the sports lover in your life. This pattern shows you how to create a pillow cover, with a football and a baseball panel.

Materials:
12 x 12 pillow
Yarn: Medium/4 Weight (Background/Main color, brown, white and red) Hook size: 4.5 mm/G
Sewing needle
Gauge Swatch:
2.5" x 2.5" = 3x3 square
You will need to know how to crochet C2C, there are a plethora of tutorials on Youtube and google for you to follow to learn the basics. If you know how to double crochet and create chains, this should be no problem. You will also need to know how to single crochet as we will single crochet a border around our square to clean up the edges.
For the detailing, I choose to use a mix of embroidery and surface crochet, though you can use whatever method you see fit or are comfortable with.
Football Panel:
For the football panel you will need three colors, the background color or main pillow cover, brown and white (for detailing).
Starting from the bottom right and working your way to the top left. I carried the yarn over in the back instead of cutting it off between colors as no one will see the inside of the pillow.

Once you finish the square DO NOT fasten off. Using the main color, single crochet around the square (about 3 in each C2C square). Fasten off.
Details:
For the detailing I simply embroidered on the white stitch marks of the football. The green lines in the image below mark where I placed the stitching. I used surface crochet for the longer lines (the ends, and the long middle stripe) and embroidered on the smaller stitches in the middle. Add more or less stitching as you see fit.

Baseball Panel:
For this you will need three colors, the main color, white and red (detailing). Once again work from the bottom right to the top left to create this panel.

Once you finish the square DO NOT fasten off. Using the main color, single crochet around the square (about 3 in each C2C square). Fasten off.
Details:
The orange and red marks in the image below show approximately where I placed the detailing marks. The longer lines I once again surface crocheted and the shorter ones I embroidered on. Add more or less stitching as you see fit. I embroidered about 4 of the red stitches on each side.

Sewing:
Sew three of the sides together before placing it around the pillow and sewing it shut. To sew this together I recommend sewing them with the wrong side facing (refer to picture below). You can sew any of the three sides together before placing it around the pillow form and sewing it closed. This can be a little tricky, just watch your fingers and line up the stitches.
**Before sewing make sure both of your panels are in the right orientation!

As always if you have any questions feel free to leave a comment, or DM me on Instagram and I'll do my best to help walk you through the steps! Tag me in any finished pieces as well, I'd love to see. Happy making!
Comments