CAL Kirby Part 4: Details and Finishing
- Sep 22, 2023
- 4 min read
Today is the day, the very last part of our crochet along, where we'll be creating all of our detailing and sewing him together. At the end of today, you'll have a finished creation just like this one!



I couldn't help myself and made two. The larger one (left) is made with the recommended yarn, the Big Twist Cuddle, and the smaller one (right) is made with various 4 weight acrylic yarns.
Before we begin, I want to make a note of what I found works best when creating Kirby in different yarn weights. For a Kirby made with the recommended yarn, Big Twist Cuddle or other 6 weight yarn, I find that using felt to create the detailing works much better than using yarn. With a 4 weight yarn, I found that you could either crochet the detailing or use felt pieces, and it worked out either way. This is all to say, this is just what I found works best for me, but as always, be creative, and do what works best for you.
There will be two parts to this pattern today, the creation of all the details under "Pattern", and the sewing portion, under "Sewing".
Materials:
Hook size (1 size below recommended)
Felt (Black, White and Pink) or Yarn (Black, White and Pink)
Thread (Black and white) OR Fabric Glue
Sewing Needle/Yarn needle
Pattern - Detailing:
There are four things that need to be done to finish Kirby off, eyes (two parts), blush and his mouth. Below I'll show examples of the different ways these pieces look and detail how to create each piece using either crochet, or felt. Placement of each of these pieces will be under the "Sewing" section.
Blush (x2):
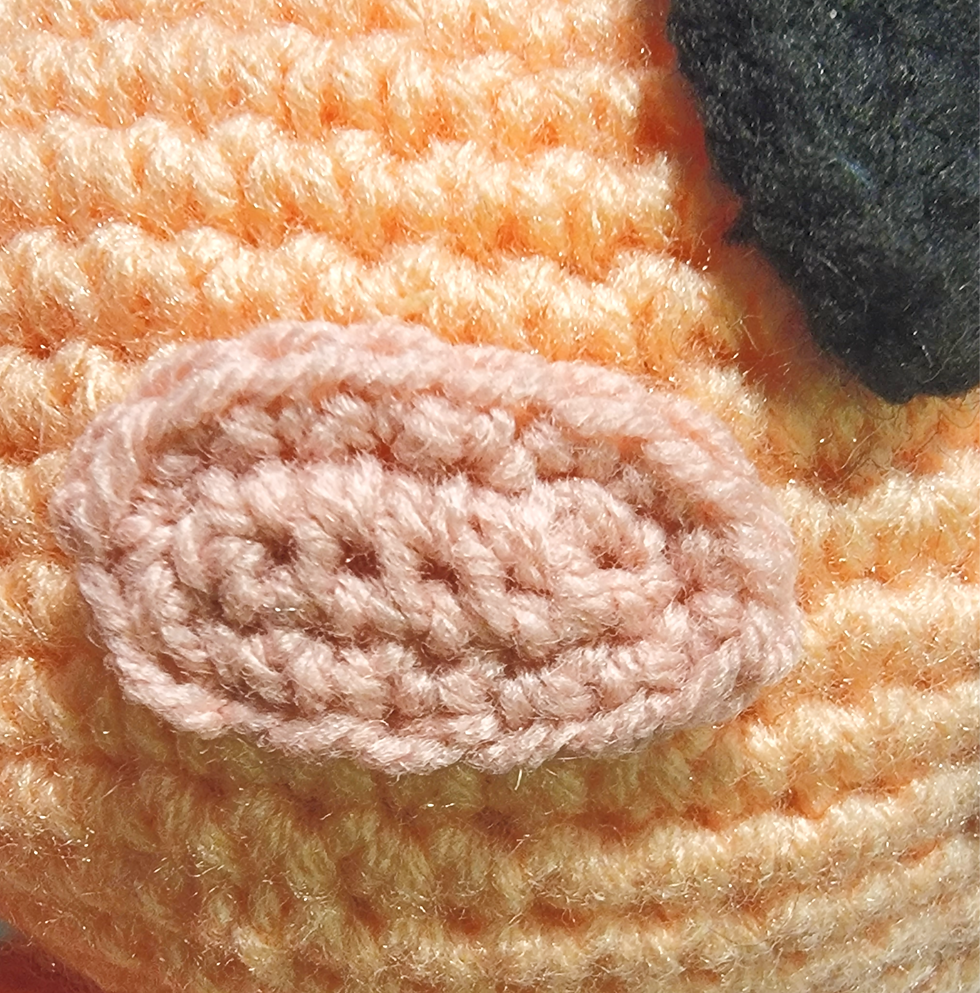
Crochet Version (Recommended for smaller yarn weights):
Round 1: Ch 6, Turn
Round 2: Sc 5, ch1, do not turn your work
Round 3: Working in the other side of the chain, Sc 5, ch1, sl st to first stitch
Round 4: (In the round) Sc 5, (Sc, ch1, Sc) in ch1 sp, Sc 5, (Sc, ch1, Sc) in ch1 sp, sl st to first stitch
Finish off. Leave a tail for sewing.
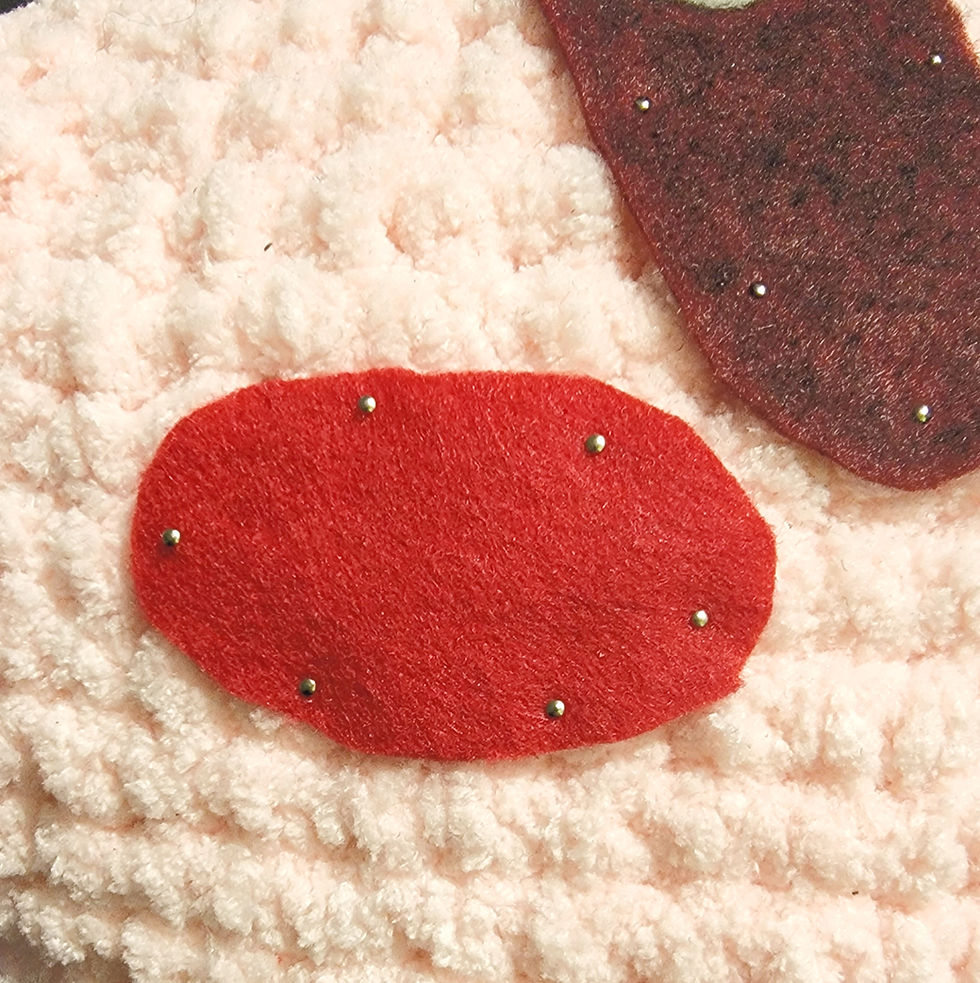
Felt Version (Recommended for bulkier yarn weights):
Using pink felt, cut out an oval. The oval should be approximately 3 stitches wide, at the widest part and 6 stitches long, at the longest part.
Eyes (Black) (x2):

Crochet Version (Recommended for smaller yarn weights):
Round 1: Ch 7, Turn
Round 2: Sc 6, Ch1, Do not turn
Round 3: Working in the other side of the chain, Sc 6, Ch1, sl st to first stitch.
Round 4: (Working in the round): Sc 6, (Sc, ch1, Sc) in Ch1 sp, Sc 6, (Sc, ch1, Sc) in ch1 sp, sl st to first stitch
Round 5: Sc 7, (Sc, ch1, Sc) in ch1 sp, Sc 8, (Sc, ch1, Sc) in ch 1 sp, Sc 1, sl st to first stitch.
Finish off. Leave a tail for sewing.
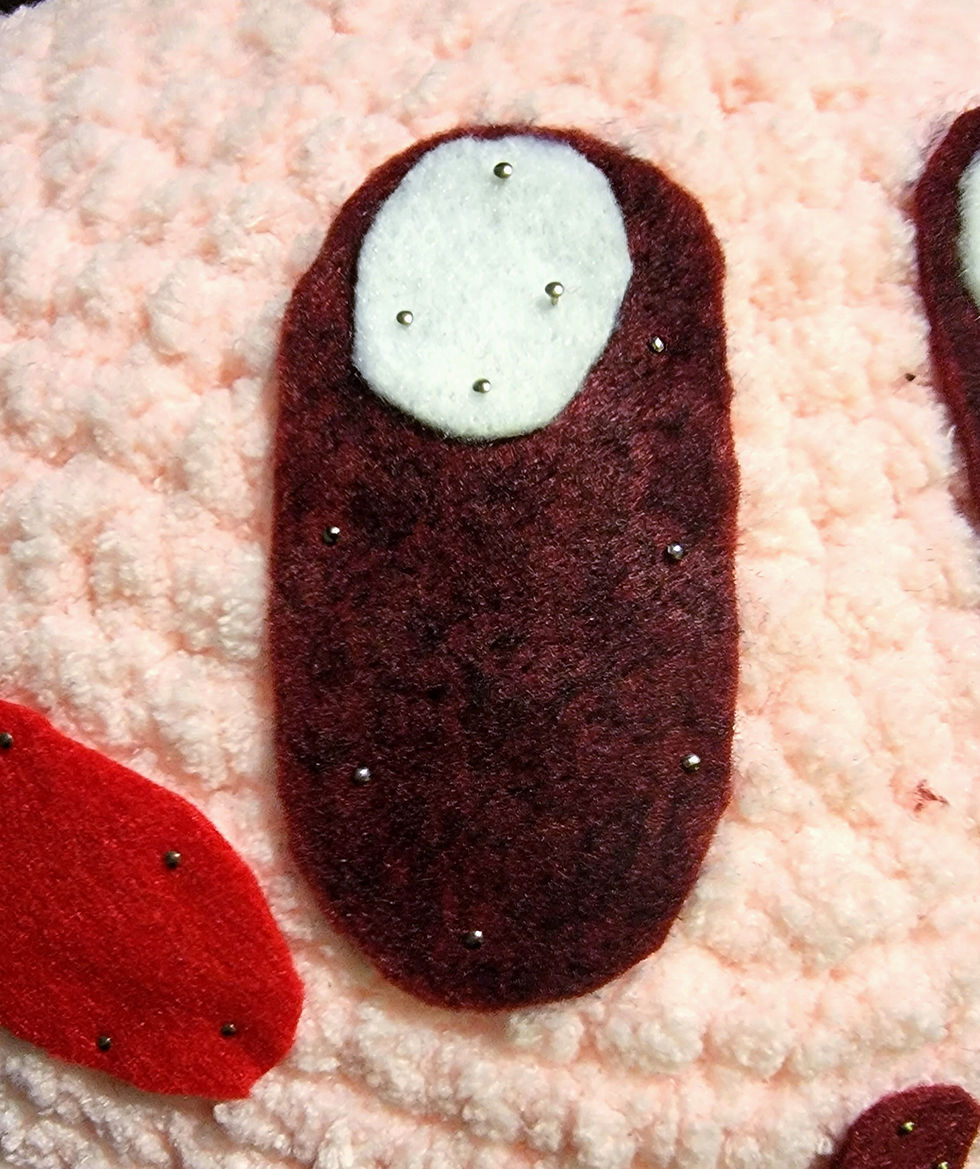
Felt Version (Recommended for bulkier yarn weights):
Cut out a piece of felt in the shape of an oval. The oval should be about 7 stitches tall at its tallest point and about 4 stitches wide at the widest point.
Eyes (White) (x2):
(Pictures shown above under "Eyes (Black)" section
Crochet Version (Recommended for smaller yarn weights):
Round 1: Sc 6 in Magic ring
Finish off. Leave a tail for sewing.
Felt Version (Recommended for bulkier yarn weights):
Cut out a piece of felt in the shape of a circle. The circle should only cover about 1/3 of the eye.
Mouth:
For the mouth, there are two options, an open mouth, or a smile.
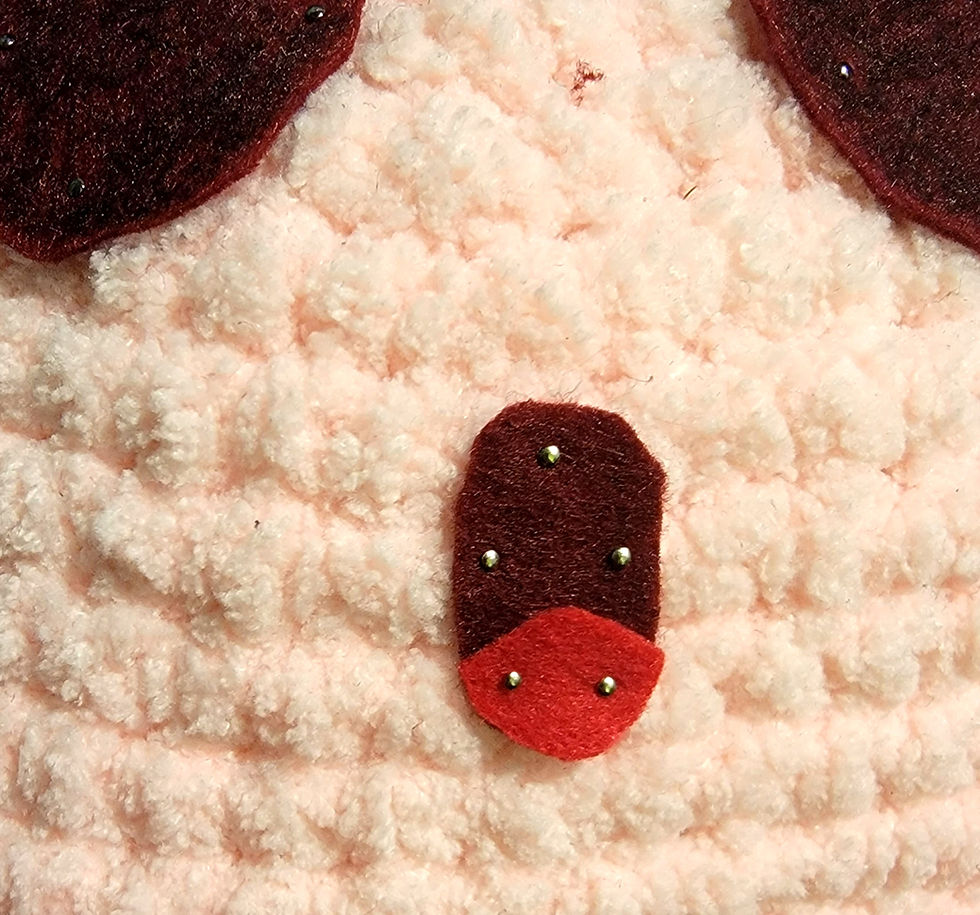
To create the open mouth I used two colors of felt, red and pink. The red piece should be about 3 stitches tall, and 1-2 stitches wide. The pink pieces will only cover about half of the red piece, and should be cut in upside down "U" shape at the top to create the illusion of his open mouth as shown below:
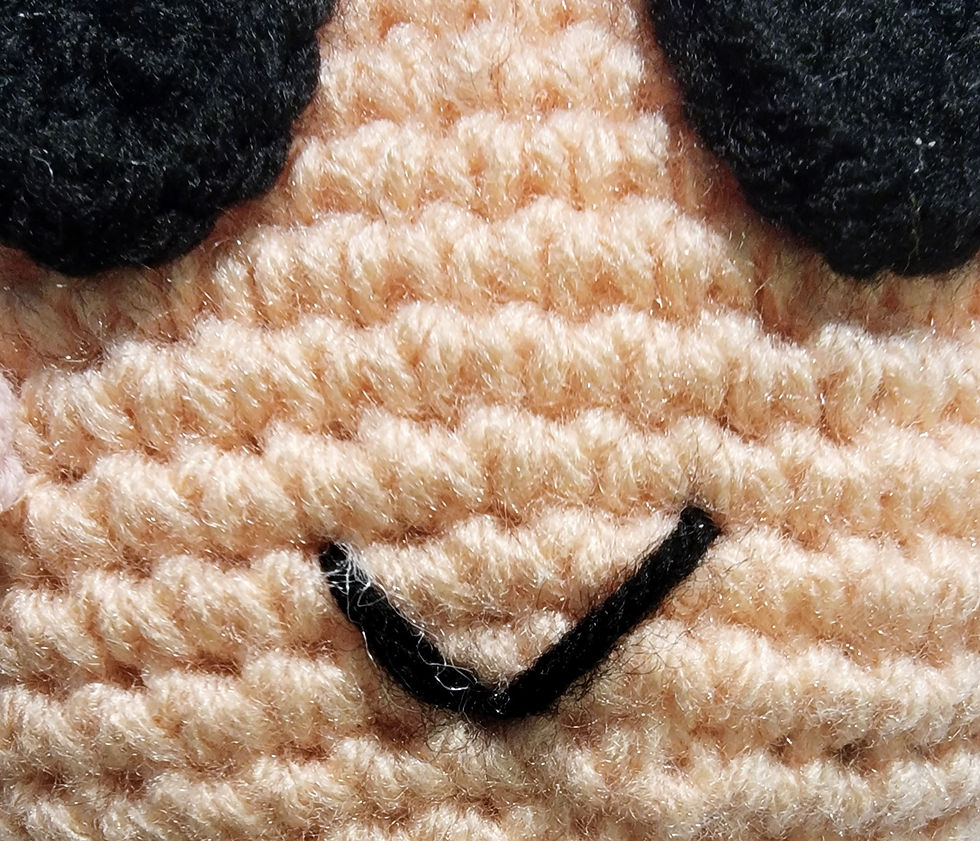
To create the smile, an embroidery method is used. It should measure about 4 stitches across and be about 2 rows tall. Insert the yarn two rows below the eyes and attach in a "V" shape as shown below:
Sewing:
For the sewing portion, I found it easiest to attach the eyes first, as I used this as a guide for positioning the mouth and blush.
Eyes:
If your Kirby is in the STANDING position, attach the black portion of the eyes between rounds 10-17, approximately 2-3 stitches apart. If your Kirby is in the SITTING position, attach the black portion of the eyes between rounds 5-12, approximately 2-3 stitches apart. This difference is due to the positioning of the feet in order to keep Kirby looking proportionate.
For either Kirby, attach the white portion of the eyes to the top part of the black portion, slightly to left (or right). Refer to the pictures above in the "Pattern" section if you are having trouble with positioning.
Blush:
Attach the blush just below and near the outer edge of the eye. It should be close, but not quite touching the eye. Refer to the pictures above for help with exact positioning.
Mouth:
The mouth should be placed 1-2 rows below and positioned inbetween the eyes, regardless of which mouth you choose.
Thats it! At this point your Kirby should be completed. Over the past few weeks we've created the head, arms, legs and all the detailing to make your very own Kirby.
I've had so much fun going on this journey with all of you, keep your eyes peeled for more CALs and patterns in the future. Next week I'll post all portions of the pattern together, so if you ever wish to create this pattern in the future, it'll be all in one place.
Tag me in your creations. Leave a comment below for questions, thoughts, etc. Subscribe to the emailing list to stay up to date and be notified of new posts. Happy crocheting all.
Comments