Citrus Fruit Coaster Crochet Pattern
- Jun 3, 2022
- 2 min read
Updated: Sep 14, 2023
Its been a while since I've made a post on here, but I've got a few free patterns in the works to share with you all coming up.
There is no sewing involved in this pattern (aside from weaving in the ends). You will need to know how to surface crochet for the details. However, surface crochet is super simple and is just another term for slip stitching over the work.
Materials:
Hook size: H/8 (5.00MM)
Yarn: Medium/4 Weight in white and the fruit color (I recommend orange, yellow or green)
Pattern:
Abbreviations:
ss = slip stitch
sc = single crochet
sc inc = single crochet increase (place two stitches in one)
Coaster:
The color changes will be marked at the beginning of the round. If there is no color indicated, continue working with the color from the previous round.
The number of stitches worked in each round is indicated in parenthesis.
Round 1: [In white] Place 8 sc inside a magic ring (8)
Round 2: [In color] (sc inc) x 8 (16) Round 3: (sc, sc inc) x 8 (24)
Round 4: ( 2 sc, sc inc) x 8 (32)
Round 5: (sc inc, 3 sc) x 8 (40) *this round is structured differently than the others in order to create a more rounded coaster
Round 6: [In white] sc around (40)
Round 7: [In color] (4 sc, sc inc) (48)
Fasten off.
Detailing:
The base of the coaster is complete at this point and all that's left is the details of the slices. This is created by using surface crochet (slip stitch).
The arrows in the image below indicate each set of slip stitches, there will be three lines in total, to create 6 slices.

Essentially what we are doing is dividing the circle into 6 equal parts. You will begin the slip stitch at the outer white circle (round 6) on one side, and end at the outer white circle directly across from it.
I do recommend using a smaller hook size for this portion of the pattern as its slightly easier to get in between the stitches. However, you don't have to use a smaller hook size as I've done this using both a 5 MM hook and 4.5 MM hook before.
After this just sew in your ends and you're done! You should end up with a coaster that looks something like this:
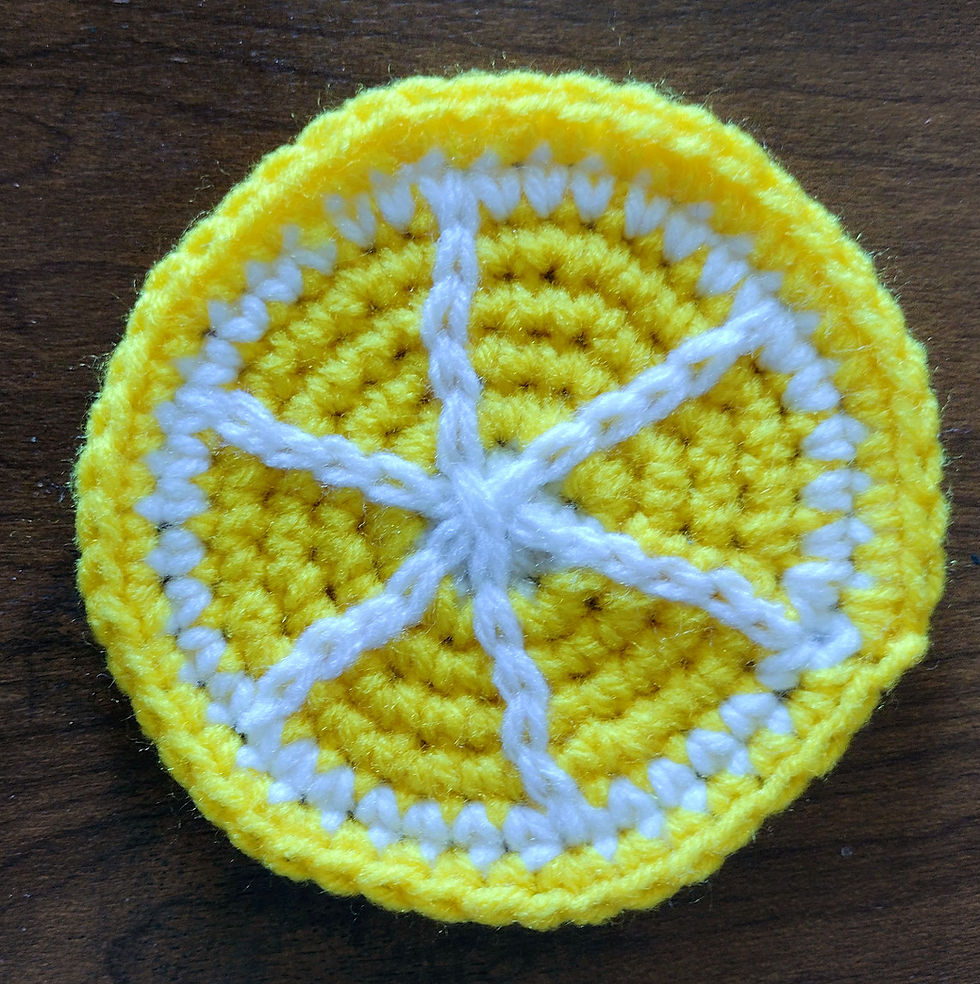
Extra Step: While it's not necessary, I do find blocking helps with the coaster lying flat. I use a spray on fabric stiffener on both sides of the coaster, then lay something heavy on top for several minutes before leaving it to dry to help maintain the shape.
I do NOT recommending using the glue + water method for blocking, as i found it leaves the coaster too hard.
Care:
If the coaster does get dirty, I recommend hand washing it to remove the stains.
If you use this pattern, I'd love to hear about it. Tag me in your finished posts on Instagram @bricraftybriyou or comment below on how yours turned out.
Happy crafting!
Comments