Crochet Pink Blob (Kirby)
- Feb 13, 2024
- 6 min read
Finally got around to consolidating the Kirby crochet-a-long into one post. Took me long enough, sorry everyone! With the new year being here I'm hoping to post some more new patterns as well as uploading my current patterns to ribblr (for free of course). If anyone's interested in having them put on ravelry as well, let me know! I want to make this as convenient as possible for everyone. I'll make an announcement on here and Instagram when they are uploaded. Stick around to see whats next, and well, by now, Happy Valentines Day everyone <3.
This post will include everything needed to crochet Kirby from materials to detailing.

Materials:
Hook Size: K/6.5mm
Yarn: Big Twist Cuddle (Pink and red, or these two colors in any weight yarn)***
Felt (Black and white)
Thread (Black and white)
Sewing Needle/Yarn needle
Poly-fill/Stuffing
***You can substitute any yarn and a hook size one letter lower (.5-1mm) than the recommended (ex: Big Twist Cuddle recommends an L, I used a K hook. The 4 weight acrylic yarn I used recommends a 5.5 hook, I used a 5)
Pattern:
There are three main sections of the pattern, the body, the arms, and the legs. Further detailing will be in the next section titled "Details".
Notes:
- The stitch count in a round is marked in the parenthesis at the end of each round.
- "x #" indicates the number of times to repeat the instructions in the parenthesis.
For example in round 3 of the body, "(Sc, Inc) x6 (18)" tells us to put a single crochet in the next stitch, followed by 2 single crochets in the following. Repeat this 6 times, for a total of 18 stitches in the round.
Abbreviations:
Sc - single crochet
Inc - increase (2 single crochet in one stitch)
Dec - decrease (single crochet two stitches together)
Body:
Round 1: 6 Sc in magic ring (6)
Round 2: (Inc) x6 (12)
Round 3: (Sc, Inc) x6 (18)
Round 4: (2 Sc, Inc) x6 (24)
Round 5: (3 Sc, Inc) x6 (30)
Round 6: (4 Sc, Inc) x 6 (36)
Round 7: (5 Sc, Inc) x6 (42)
Round 8: (6 Sc, Inc) x6 (48)

Round 9: (7 Sc, Inc) x6 (54)
Round 10: (8 Sc, Inc) x6 (60)
Round 11: (9 Sc, Inc) x6 (66)
Round 12: (10 Sc, Inc) x6 (72)
*Rounds 13-21: Sc around (72)
Round 22: (Sc 10, Dec) x6 (66)
Round 23: (Sc 9, Dec) x6 (60)
Round 24: (Sc 8, Dec) x6 (54)
Round 25: (Sc 7, Dec) x6 (48)
Round 26: (Sc 6, Dec) x6 (42)
Round 27: (Sc 5, Dec) x6 (36)
Round 28: (Sc 4, Dec) x6 (30)
Round 29: (Sc 3, Dec) x6 (24) **Begin to stuff here, stuff firmly
Round 30: (Sc 2, Dec) x6 (18)
Round 31: (Sc, Dec) x6 (12)
Round 32: (Dec) x6 (6)
Finish off. Sew in ends.
Arms (x2):
Round 1: Sc in magic ring (6)
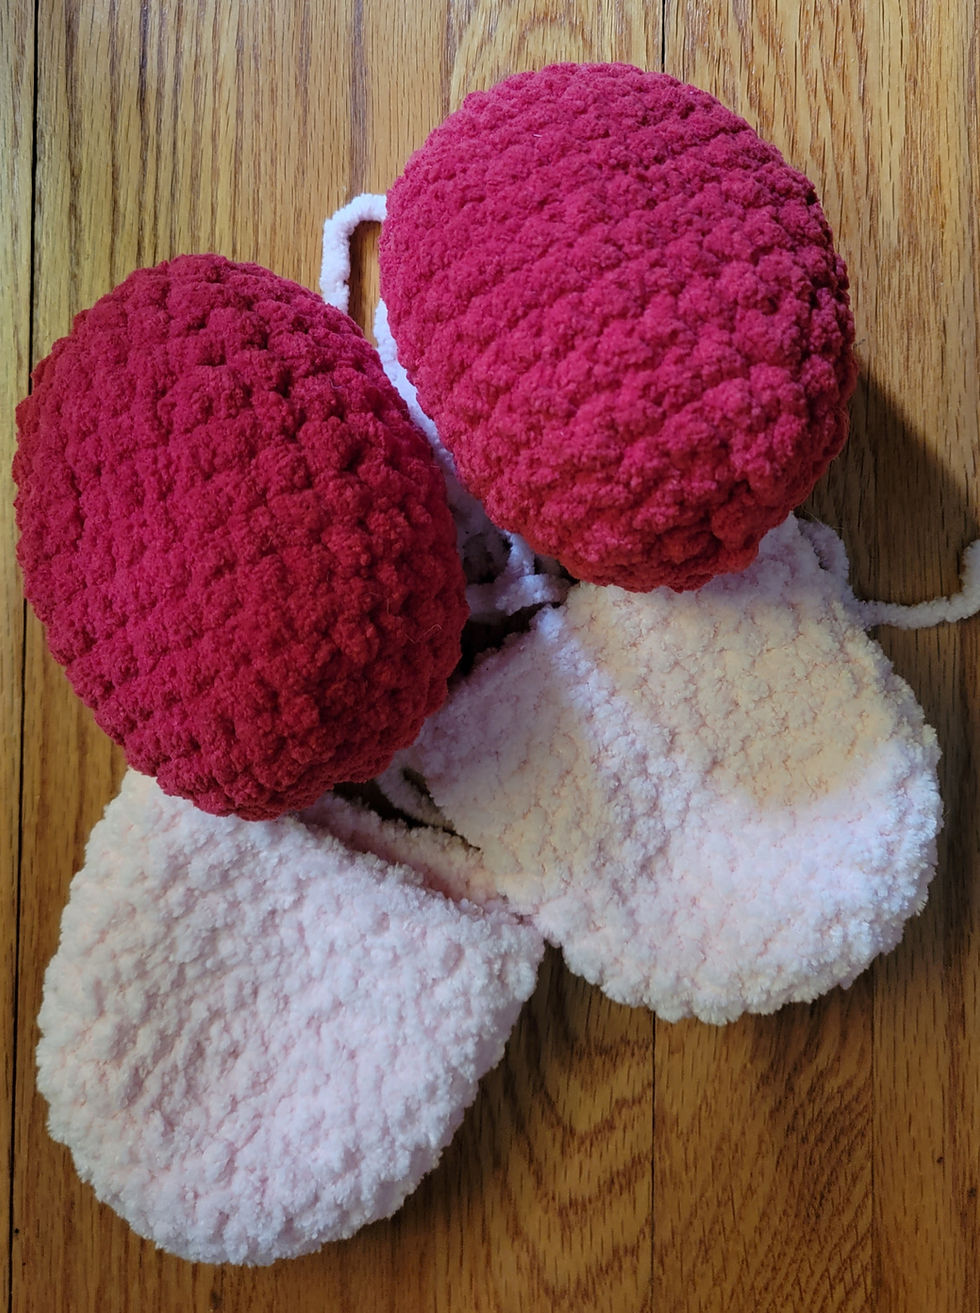
Round 2: (Inc) x6 (12)
Round 3: (Sc, Inc) x6 (18)
Round 4: (Sc 2, Inc) x6 (24)
Round 5-12: Sc around (24)
Stuff lightly. Finish off. Leave a long tail for sewing.
Legs (x2):
Round 1: Sc in magic ring (6)
Round 2: (Inc) x6 (12)
Round 3: (Sc, Inc) x6 (18)
Round 4: (Sc 2, Inc) x6 (24)
Round 5: Sc around (24)
Round 6: (Sc 3, Inc) x6 (30)
Round 7-11: Sc around (30)
Round 12: (Sc 3, Dec) x6 (24)
Round 13: Sc around (24)
Round 14: (Sc 2, Dec) x6 (18) **Begin to stuff
Round 15: (Sc, Dec) x6 (12)
Round 16: (Dec) x6 (6)
Finish off. Weave in ends.
Details:
Blush (x2):
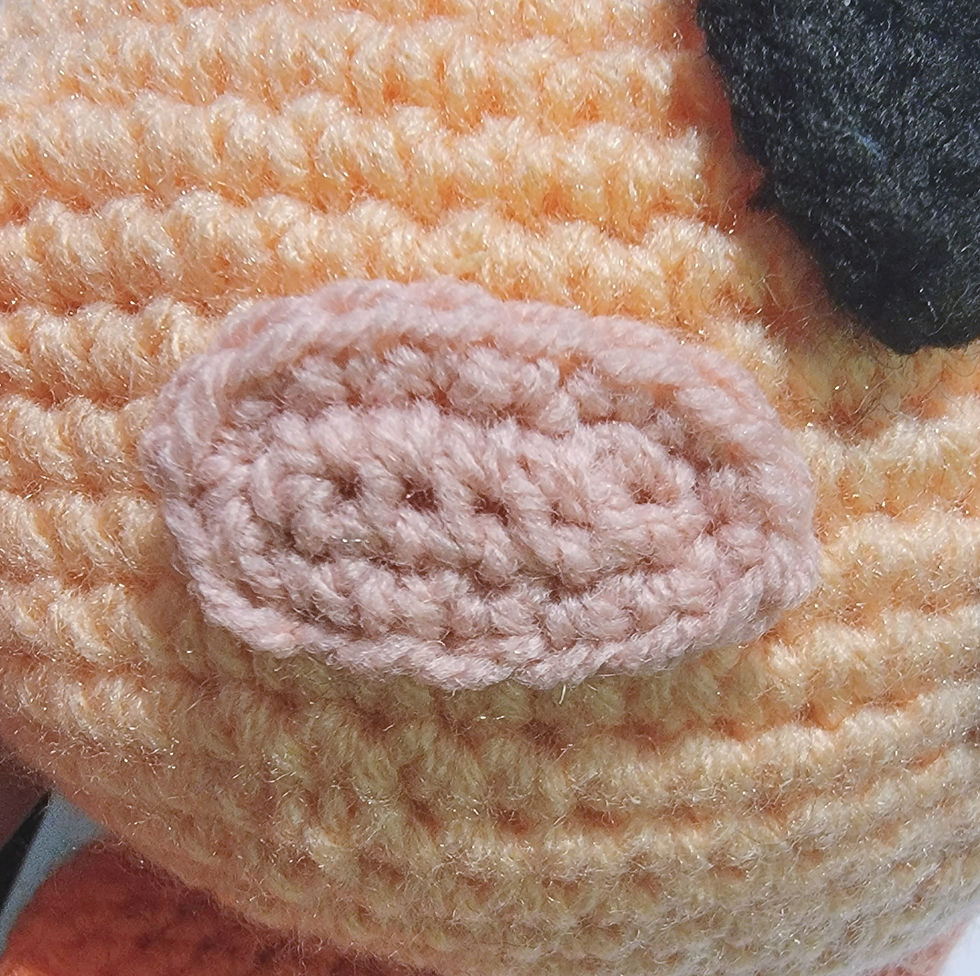
Crochet Version
Round 1: Ch 6, Turn
Round 2: Sc 5, ch1, do not turn your work
Round 3: Working in the other side of the chain, Sc 5, ch1, sl st to first stitch
Round 4: (In the round) Sc 5, (Sc, ch1, Sc) in ch1 sp, Sc 5, (Sc, ch1, Sc) in ch1 sp, sl st to first stitch
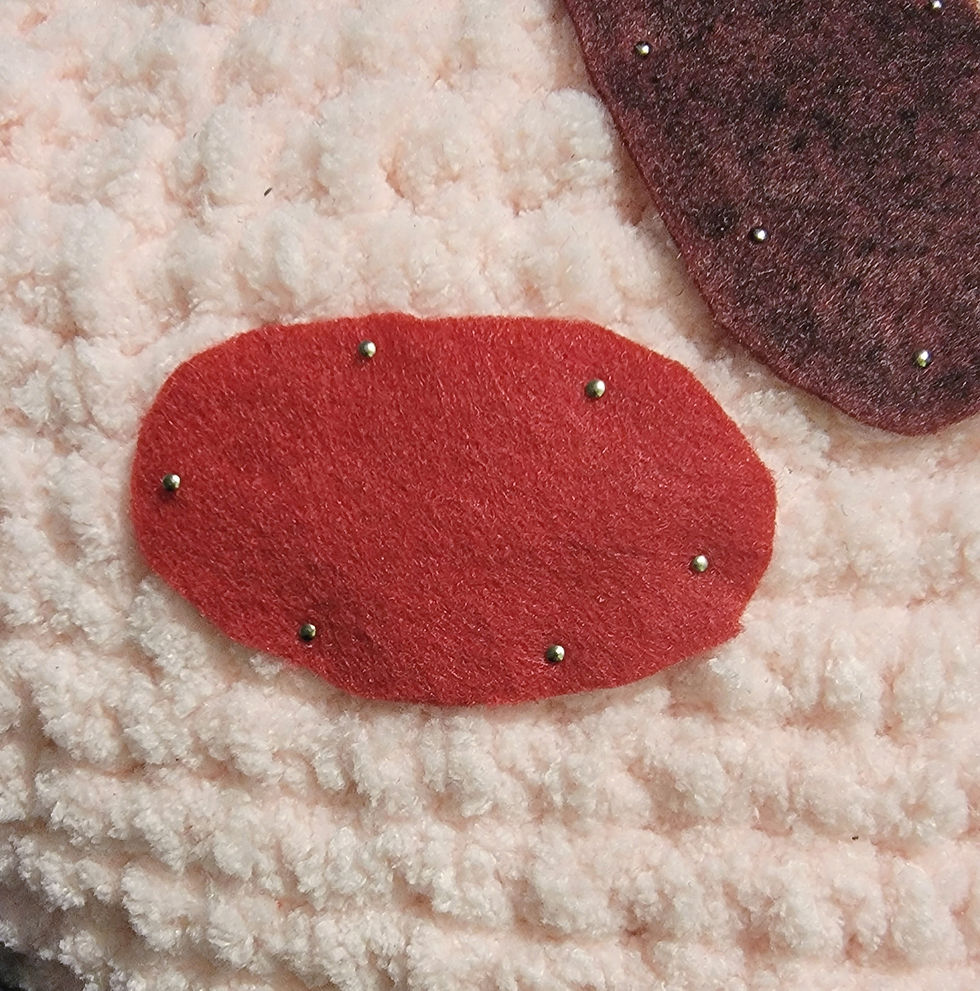
Felt Version
Using pink felt, cut out an oval. The oval should be approximately 3 stitches wide, at the widest part and 6 stitches long, at the longest part.
Eyes (x2):
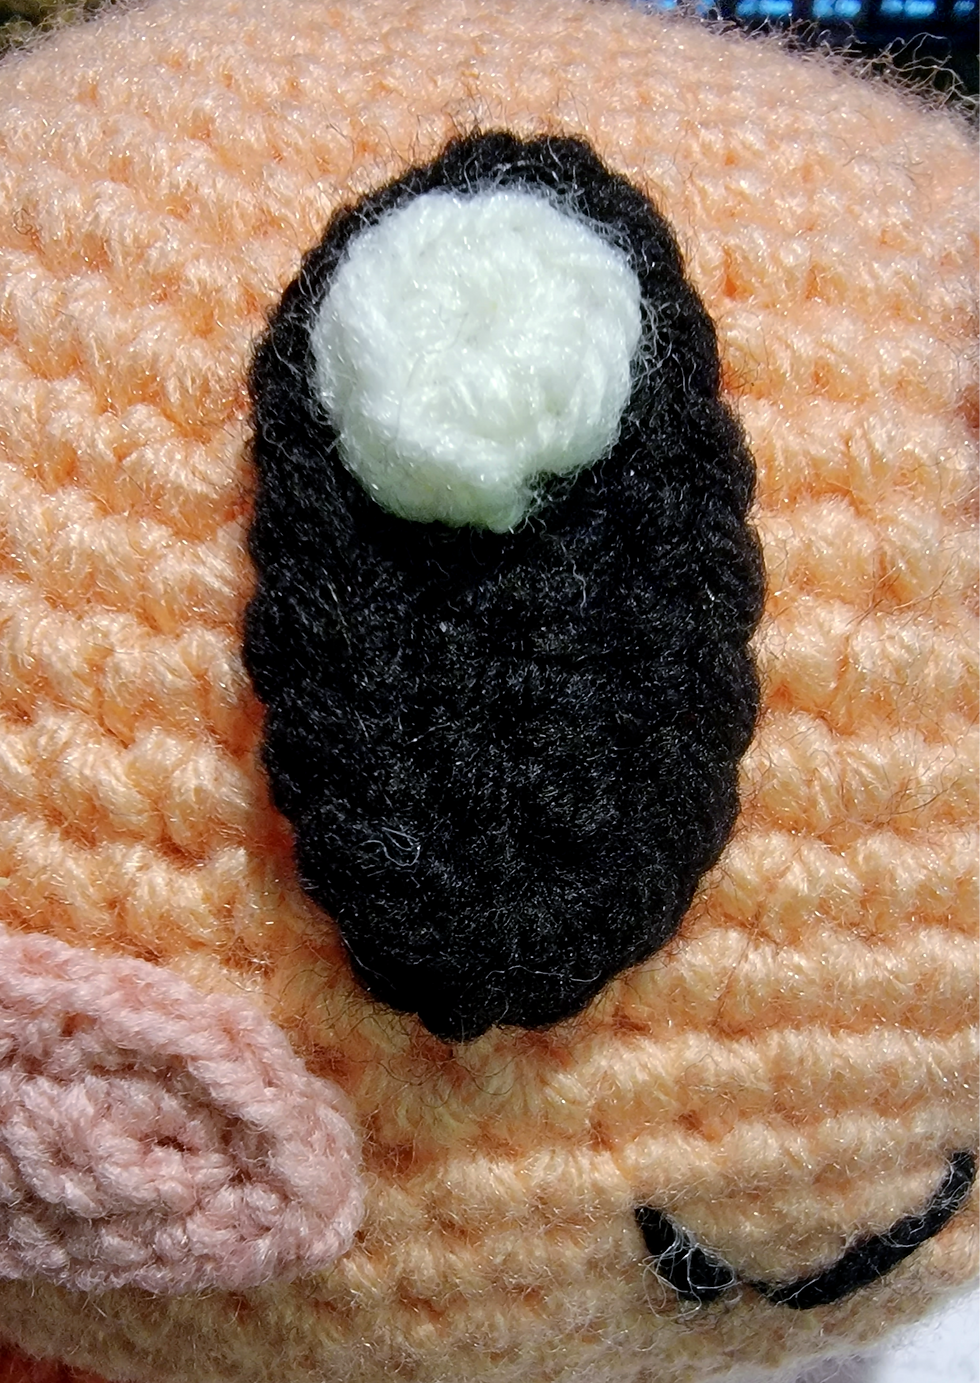
Crochet Version (Recommended for smaller yarn weights)
Black portion:
Round 1: Ch 7, Turn
Round 2: Sc 6, Ch1, Do not turn
Round 3: Working in the other side of the chain, Sc 6, Ch1, sl st to first stitch.
Round 4: (Working in the round): Sc 6, (Sc, ch1, Sc) in Ch1 sp, Sc 6, (Sc, ch1, Sc) in ch1 sp, sl st to first stitch
Round 5: Sc 7, (Sc, ch1, Sc) in ch1 sp, Sc 8, (Sc, ch1, Sc) in ch 1 sp, Sc 1, sl st to first stitch.
Finish off. Leave a tail for sewing.
White portion:
Round 1: Sc 6 in Magic ring
Finish off. Leave a tail for sewing.

Felt Version (Recommended for bulkier yarn weights)
Black portion:
Cut out a piece of felt in the shape of an oval. The oval should be about 7 stitches tall at its tallest point and about 4 stitches wide at the widest point.
White portion:
Cut out a piece of felt in the shape of a circle. The circle should only cover about 1/3 of the eye.
Mouth:
For the mouth, there are two options, an open mouth, or a smile.

Open Mouth
To create the open mouth I used two colors of felt, red and pink. The red piece should be about 3 stitches tall, and 1-2 stitches wide. The pink pieces will only cover about half of the red piece, and should be cut in upside down "U" shape at the top to create the illusion of his open mouth as shown:
Smile
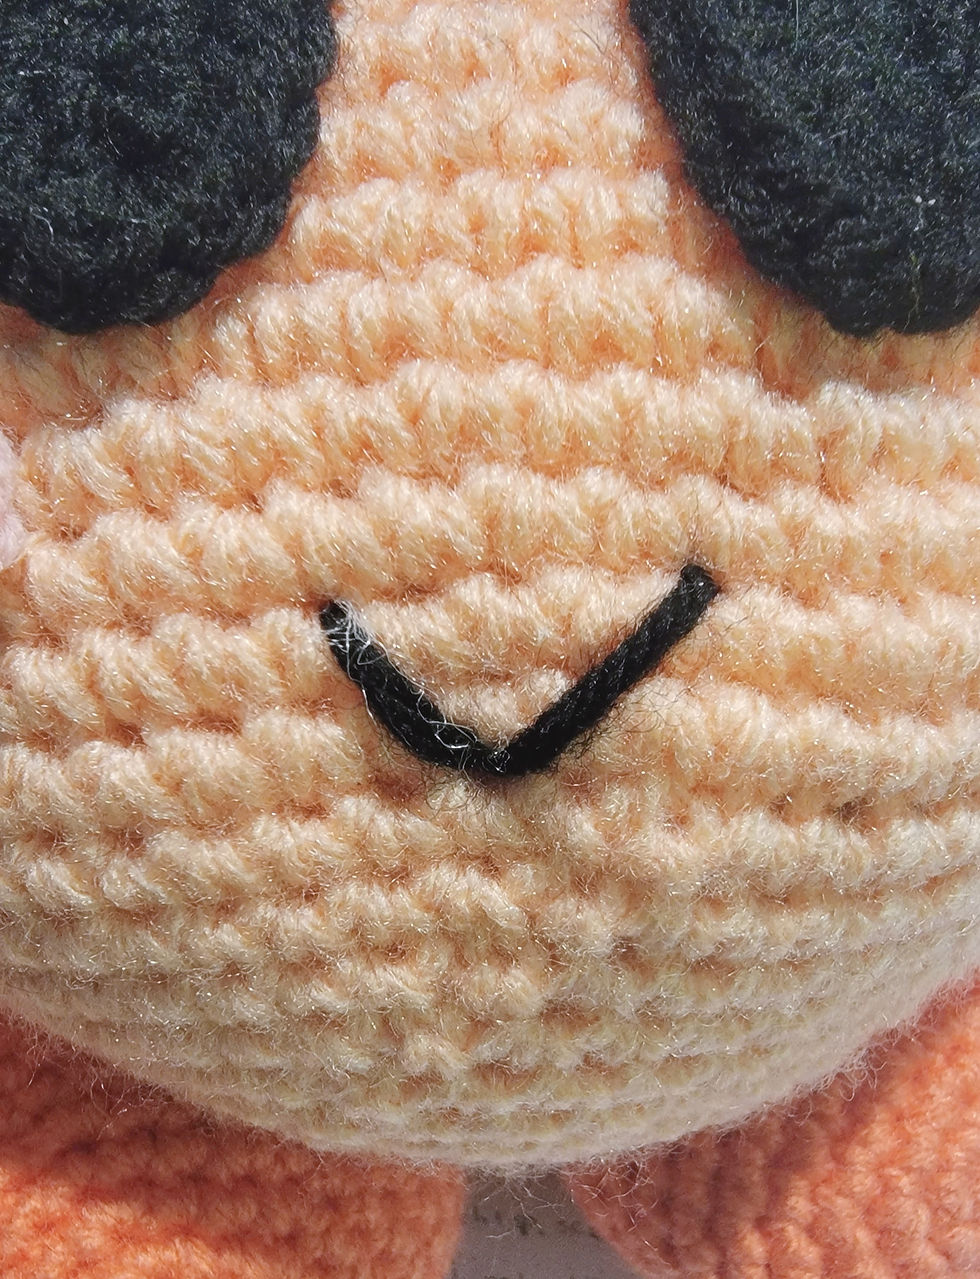
To create the smile, an embroidery method is used. It should measure about 4 stitches across and be about 2 rows tall. Insert the yarn two rows below the eyes and attach in a "V" shape as shown:
Sewing:
In this section we will learn how to sew the legs and arms to the body, as well as the facial detailing.
Legs (Standing):
For sewing, we'll start with the legs. For this, we have two options, sitting or standing. If you would like your Kirby to be in a standing position, the legs will be sewn to the bottom of the body as shown:
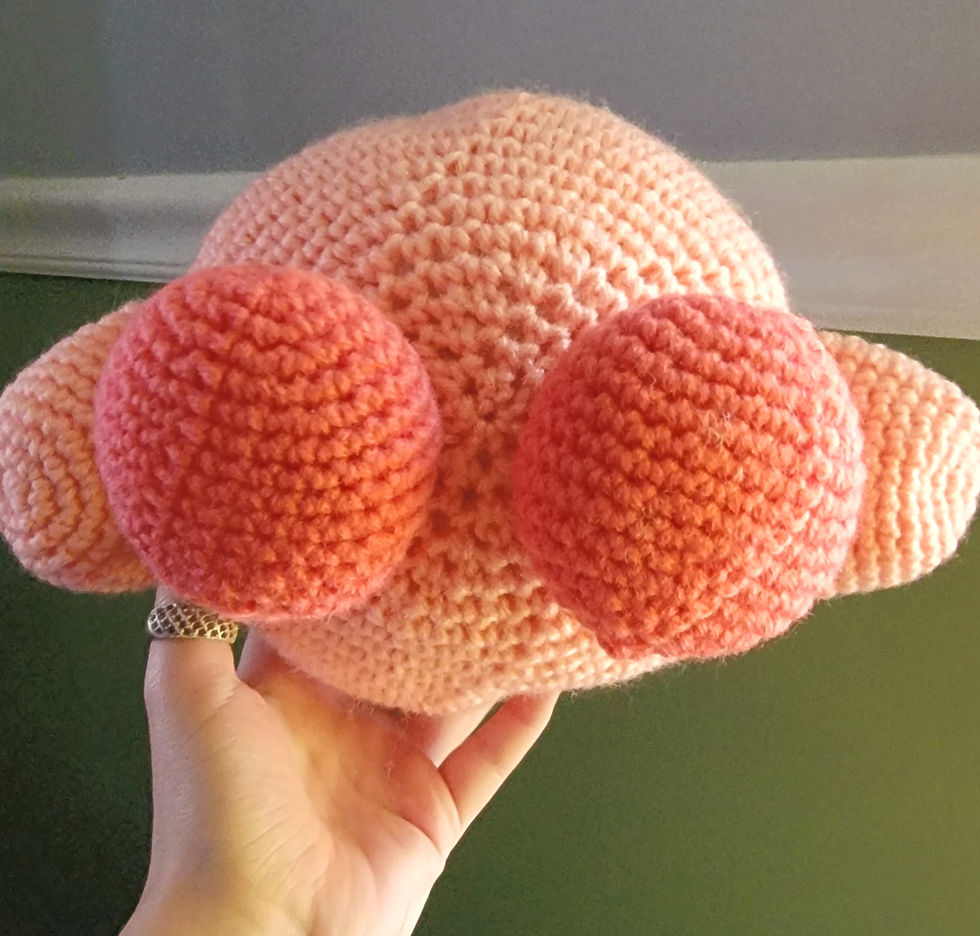
This may take some trial and error, as he can be somewhat top heavy, just be sure to place them in the middle, with a little space in between the feet (about 2 stitches), so that he can balance.
If you find this is not working, you may want to place something heavy (stones, marble pebbles,etc.) in Kirby's feet, so that they have some weight and are able to hold him steady. Not necessary, but it may help. Personally, I just make sure he is leaned up against something and he does okay, though yours may stand just fine!
Legs (Sitting):
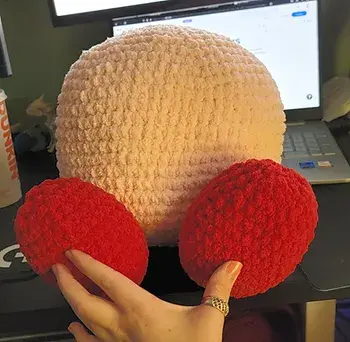
If you would like your Kirby to be in a sitting position, the legs will be placed in front of the body, instead of on the bottom. The legs will be placed between rounds 19-23 of the body and the middle 5 rounds of the feet. Sew those five rounds together as shown:
Arms (Up):
For Kirby to have his arms up in the air we are going to sew the open arm, to rounds 9-15 of the body. Shown below as:

Arms (At his sides):
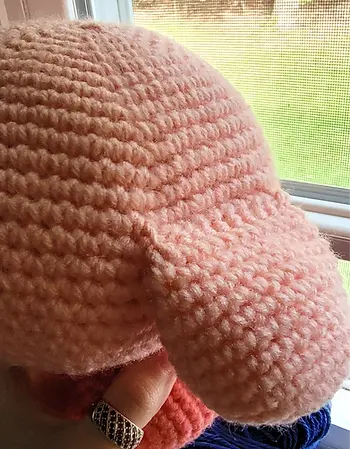
If you would like your Kirby to have his arms at his sides, there's one extra step before we sew the arms on. For this, you will have to sew the arms closed first. Take stitches from each side of the arm and sew shut in a straight line.
After you have done this, you can attach the arm to round 15, as shown:
Eyes:
If your Kirby is in the STANDING position, attach the black portion of the eyes between rounds 10-17, approximately 2-3 stitches apart. If your Kirby is in the SITTING position, attach the black portion of the eyes between rounds 5-12, approximately 2-3 stitches apart. This difference is due to the positioning of the feet in order to keep Kirby looking proportionate.
For either Kirby, attach the white portion of the eyes to the top part of the black portion, slightly to left (or right). Refer to the pictures above under detailing in the "Eye" section if you are having trouble with positioning.
Blush:
Attach the blush just below and near the outer edge of the eye. It should be close, but not quite touching the eye. Refer to the pictures above in the detailing section under "Blush" for help with exact positioning.
Mouth:
The mouth should be placed 1-2 rows below and positioned in between the eyes, regardless of which mouth you choose. Refer to "Mouth" under the detailing portion for more exact positioning.
As always, enjoy your new creation! Be sure to follow on Instagram for updates and new makes. Subscribe here to be notified when I post on the blog.
As I mentioned before, I'm looking into uploading my patterns onto ribblr, but let me know if you'd like them put on ravelry as well, or any other site people use (ribblr and ravelry are the only two big ones i know of). Questions, concerns, advice or even just saying "hello!" are always welcome in the comments. Until next time, happy crafting!
-Bri
Comments