Sandworm Scarf
- Sep 25, 2024
- 3 min read
I don't know about you all but I was very excited for the new Beetlejuice movie. As such, I obviously needed to create something inspired by it, and ended up with this sandworm scarf!
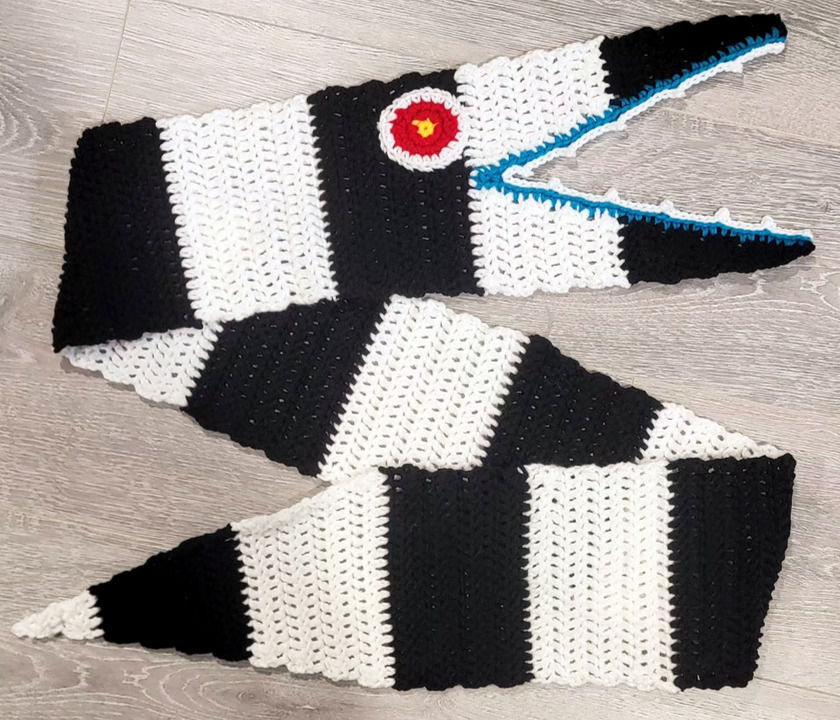
This will be a crochet pattern to create a sandworm scarf. It is a beginner to advanced beginner pattern, there is minimal sewing. It does, however, involve color changes and working in the front/back loops. The stitches used in this pattern are single crochet, double crochet, and the picot stitch. You can also make it as long or short as you'd like to!
Materials:
Hook Size: 5.5mm hook
Yarn: 4/medium weight (black, white, yellow, red and blue)
Sewing Needle/Yarn needle
Pattern:
The pattern is worked up as a black and white striped scarf, with the head portion of the sandworm added on one end, and the tail added on the other.
Notes:
- The stitch count in a round is marked in the parenthesis at the end of each round.
- "x #" indicates the number of times to repeat the instructions in the parenthesis.
Abbreviations:
Ch - chain
Sc - single crochet
Dc - double crochet
Inc - increase
Dec - decrease
FLO - front loop only
BLO - back loop only
Main Scarf:
(In white) Chain 21. Starting in the 2nd chain from the hook, Dc. Dc in each stitch across. Ch2 and turn. (20)
Dc across. Ch2 and turn. (20) Repeat for 6 more rows. Change color to black.
Dc across. (20) Repeat for 7 more rows. Change color to white.
Dc across. (20) Repeat for 7 more rows.
Continue to repeat steps 3 and 4 for as long as you wish the scarf to be. For me, I had 11 black and white stripes in total (not including the head or tail). This was enough to wrap the scarf around my neck once.
**Each stripe should be 8 rows of double crochet
Sandworm Head Portion:
Starting in the next row. Dc 10. Ch2 and turn. (10)
Dec, Dc to end. Ch2 and turn. (9)
Dc across. Ch2 and turn. (9)
Repeat rows 2 and 3 until you have 1 stitch left. Don't forget to change the color every 8 rows. It is up to you to change the color on the last 2 rows at the tip of the head, or to keep it the same. I personally kept the color the same. (Shown below)
Repeat steps 1-4 for the other side of the mouth.
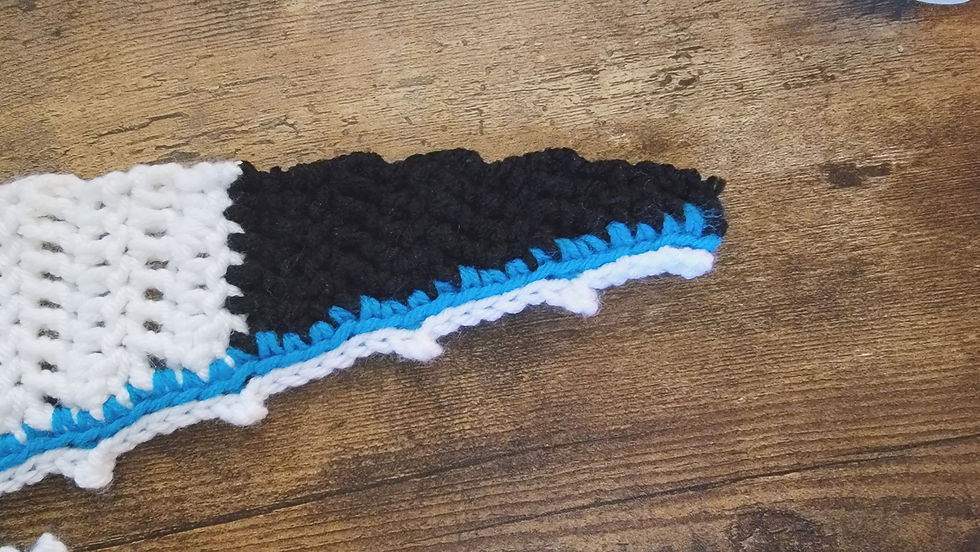
To finish off the mouth we will need to make the blue outline of the mouth, and the teeth.
In blue, sc on the inside of the mouth, leaving one to two sc in each stitch. Once you reach the point of the "V", create a Dec between the two sides. This will help close the gap on the mouth and prevent bunching. Continue to sc down the other side of the mouth. Finish off the blue yarn.
In white, attach the yarn with the right side of your scarf facing you. Sl St in the BLO, placing a picot stitch every 5 or so sl st, making sure to keep them evenly spaced. Before, you reach the point of the "V" , sl st to the other side 2 stitches before the point. Once again, this is just to keep the shape of the mouth. Continue placing the sl st's and picots on the other side of the mouth. Be sure to stagger the picot stitches with the other side. Finish off and sew in the ends.
Eye:
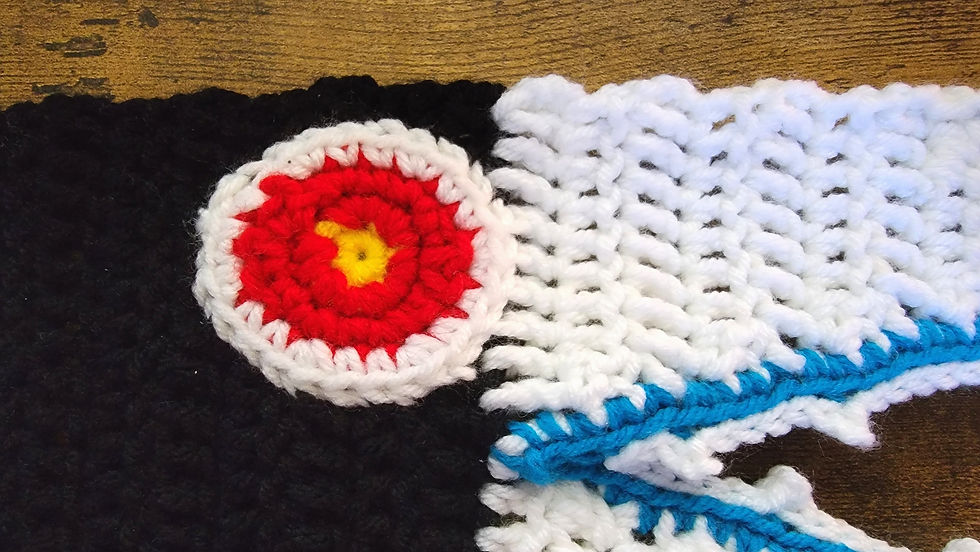
To create the eye, make a magic ring.
In yellow, sc 6 in the magic ring. Finish off. (6)
In red, sc inc in each stitch. Finish off. (12)
Ch 2, Hdc, Dc Inc, Hdc, Sc Inc, Sc, Sc Inc, Hdc, Dc Inc, Hdc, Sc Inc, Sc, Sc Inc (18) Finish off.
In white, (Sc 2, Inc) x 6 (24) Finish off and leave a long tail for sewing.
Attach the eye just before the beginning of the mouth portion. The eye should rest on the edge of the stripe just before the mouth portion begins.
Tail Portion:
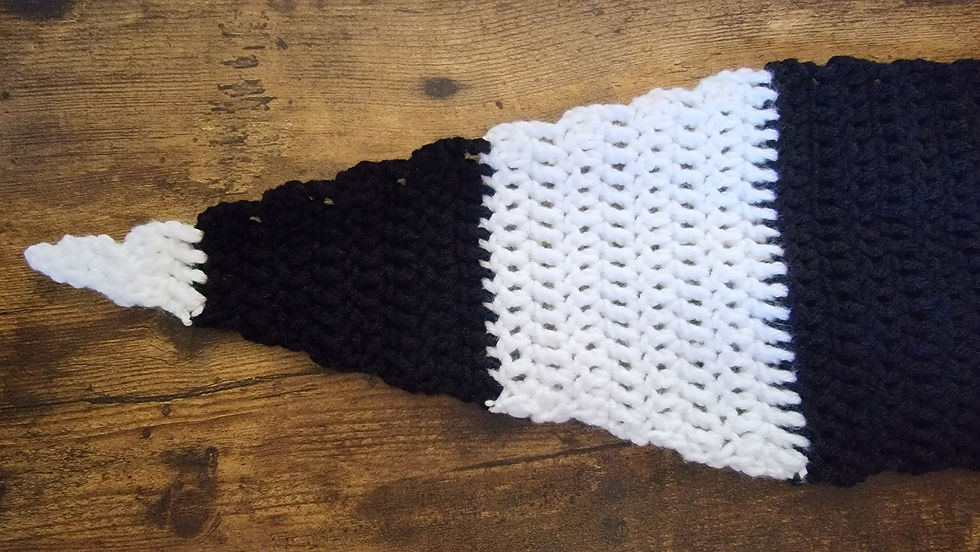
Attach the yarn to the other end of the scarf.
Ch2, Dc across. Ch2 and turn. (20)
Dec, Dc across, Dec. Ch2 and turn. (18)
Repeat steps 1 and 2, changing colors every 8 rows, until there is one stitch left.
On the last Dc, create a picot stitch. Finish off and sew in ends.
*Note, on the last color change, there will not be a full 8 rows. Once again its up to you to change the color or keep it the same as the previous for the last few rows.
And that is it! Your very own sandworm scarf! I hope you all enjoy and have as much fun creating this project as I did. Happy fall and I will hopefully be back soon with another pattern! (Hint: It uses chunky yarn)
Comments